

3 Ways to Reduce Image File Size: Dimensions, Quality or Format First?
You can shrink an image by changing its dimensions, quality or format. I reduced a 608KB portrait step by step to find the order that saves the most with the least visible loss, and whether to cut dimensions or quality at the same file size.
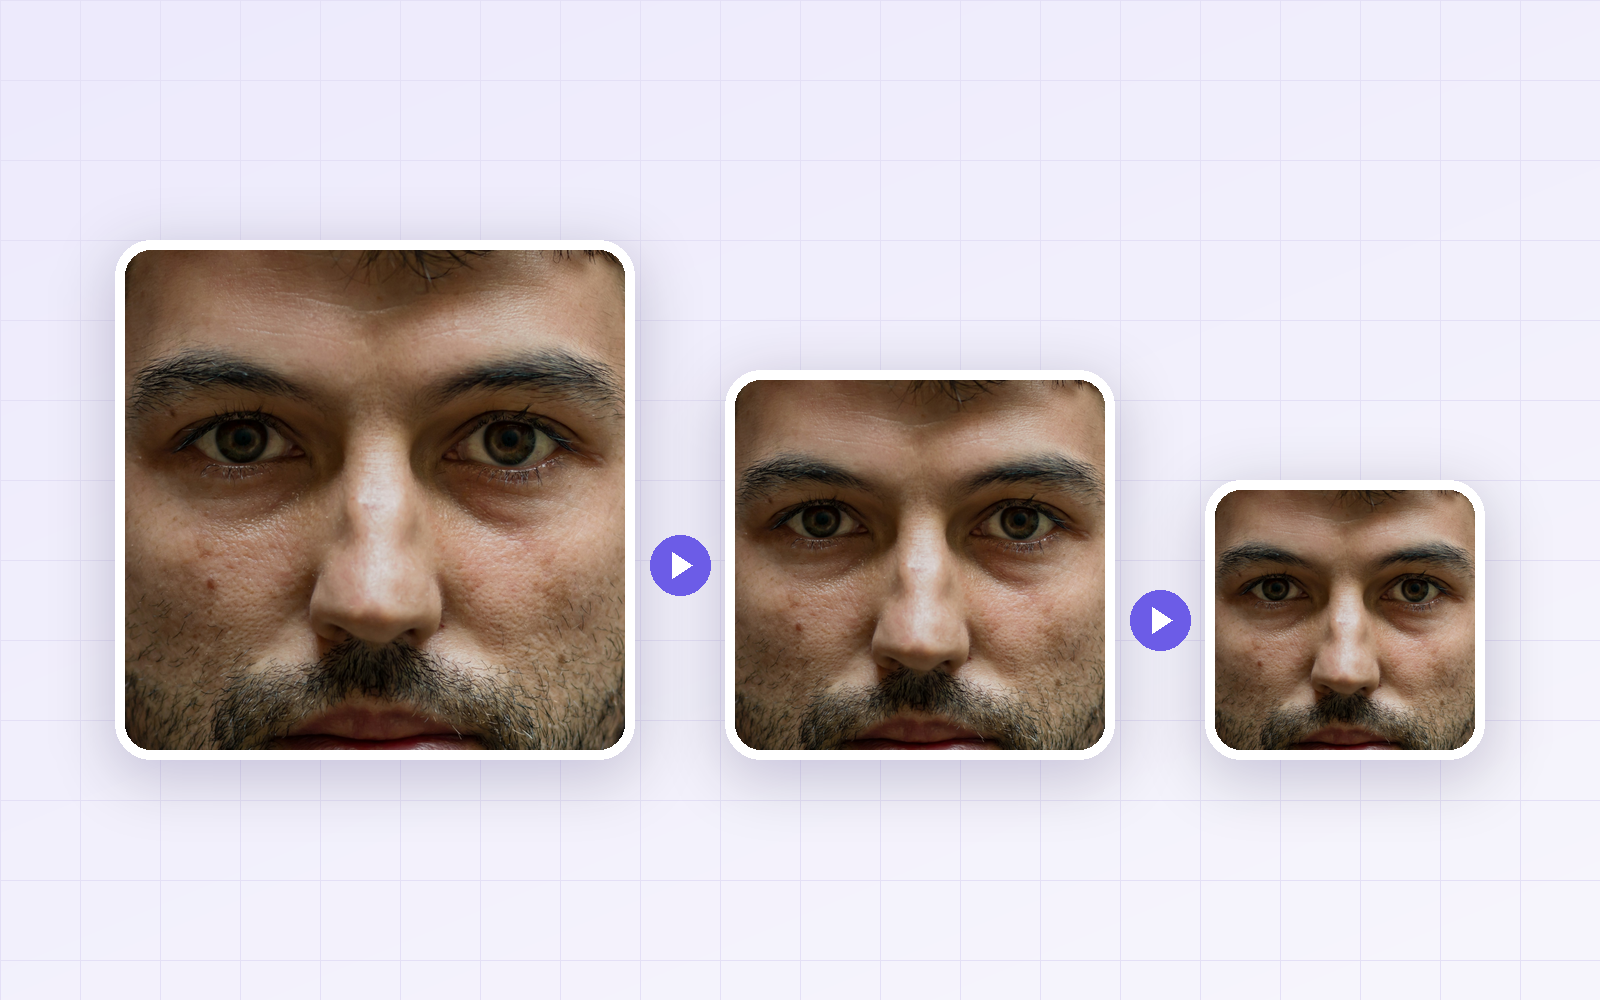
There are really only three ways to make an image file smaller: reduce its dimensions (pixels), lower the compression quality, or change the file format. But the order you use them in changes how good the result looks at the same file size. So I took one 608KB portrait and shrank it step by step, checking file size and quality at each stage.
Bottom line: the most efficient order was ① resize to the size you'll actually display → ② quality 80 → ③ WebP if you need more. That took the photo from 608KB to 37KB with almost no visible difference at article width. And when you have to hit a specific file size, resizing kept more quality than cranking the quality setting down.
The order at a glance
| Step | What to do | Size in this test | PicLever tool |
|---|---|---|---|
| ① Dimensions | Resize to the width you'll display (2400 → 800px) | 608KB → 87KB | Image Resizer |
| ② Quality | JPG quality 90 → 80 | 87KB → 58KB | Image Compressor |
| ③ Format | Switch to WebP 80 if you need more | 58KB → 37KB | Image Compressor |
If your photo is saved as PNG, convert it to JPG before step ①—that alone cuts the size dramatically. Logos, screenshots and text-heavy graphics are the opposite: keep them as PNG or WebP rather than JPG. The JPG vs PNG vs WebP test explains why.
Test setup
-
Sample: portrait photo 2400×1714px, JPG 608KB — Photo: Jaime Lopes / Unsplash
-
Assumes the photo goes into a blog post about 800px wide. Every result was displayed at 800px, then the same area was zoomed about 180%.
-
Similarity to the original measured with SSIM (closer to 1 = closer to the original) · Tested 2026-09-28
Shrinking it step by step
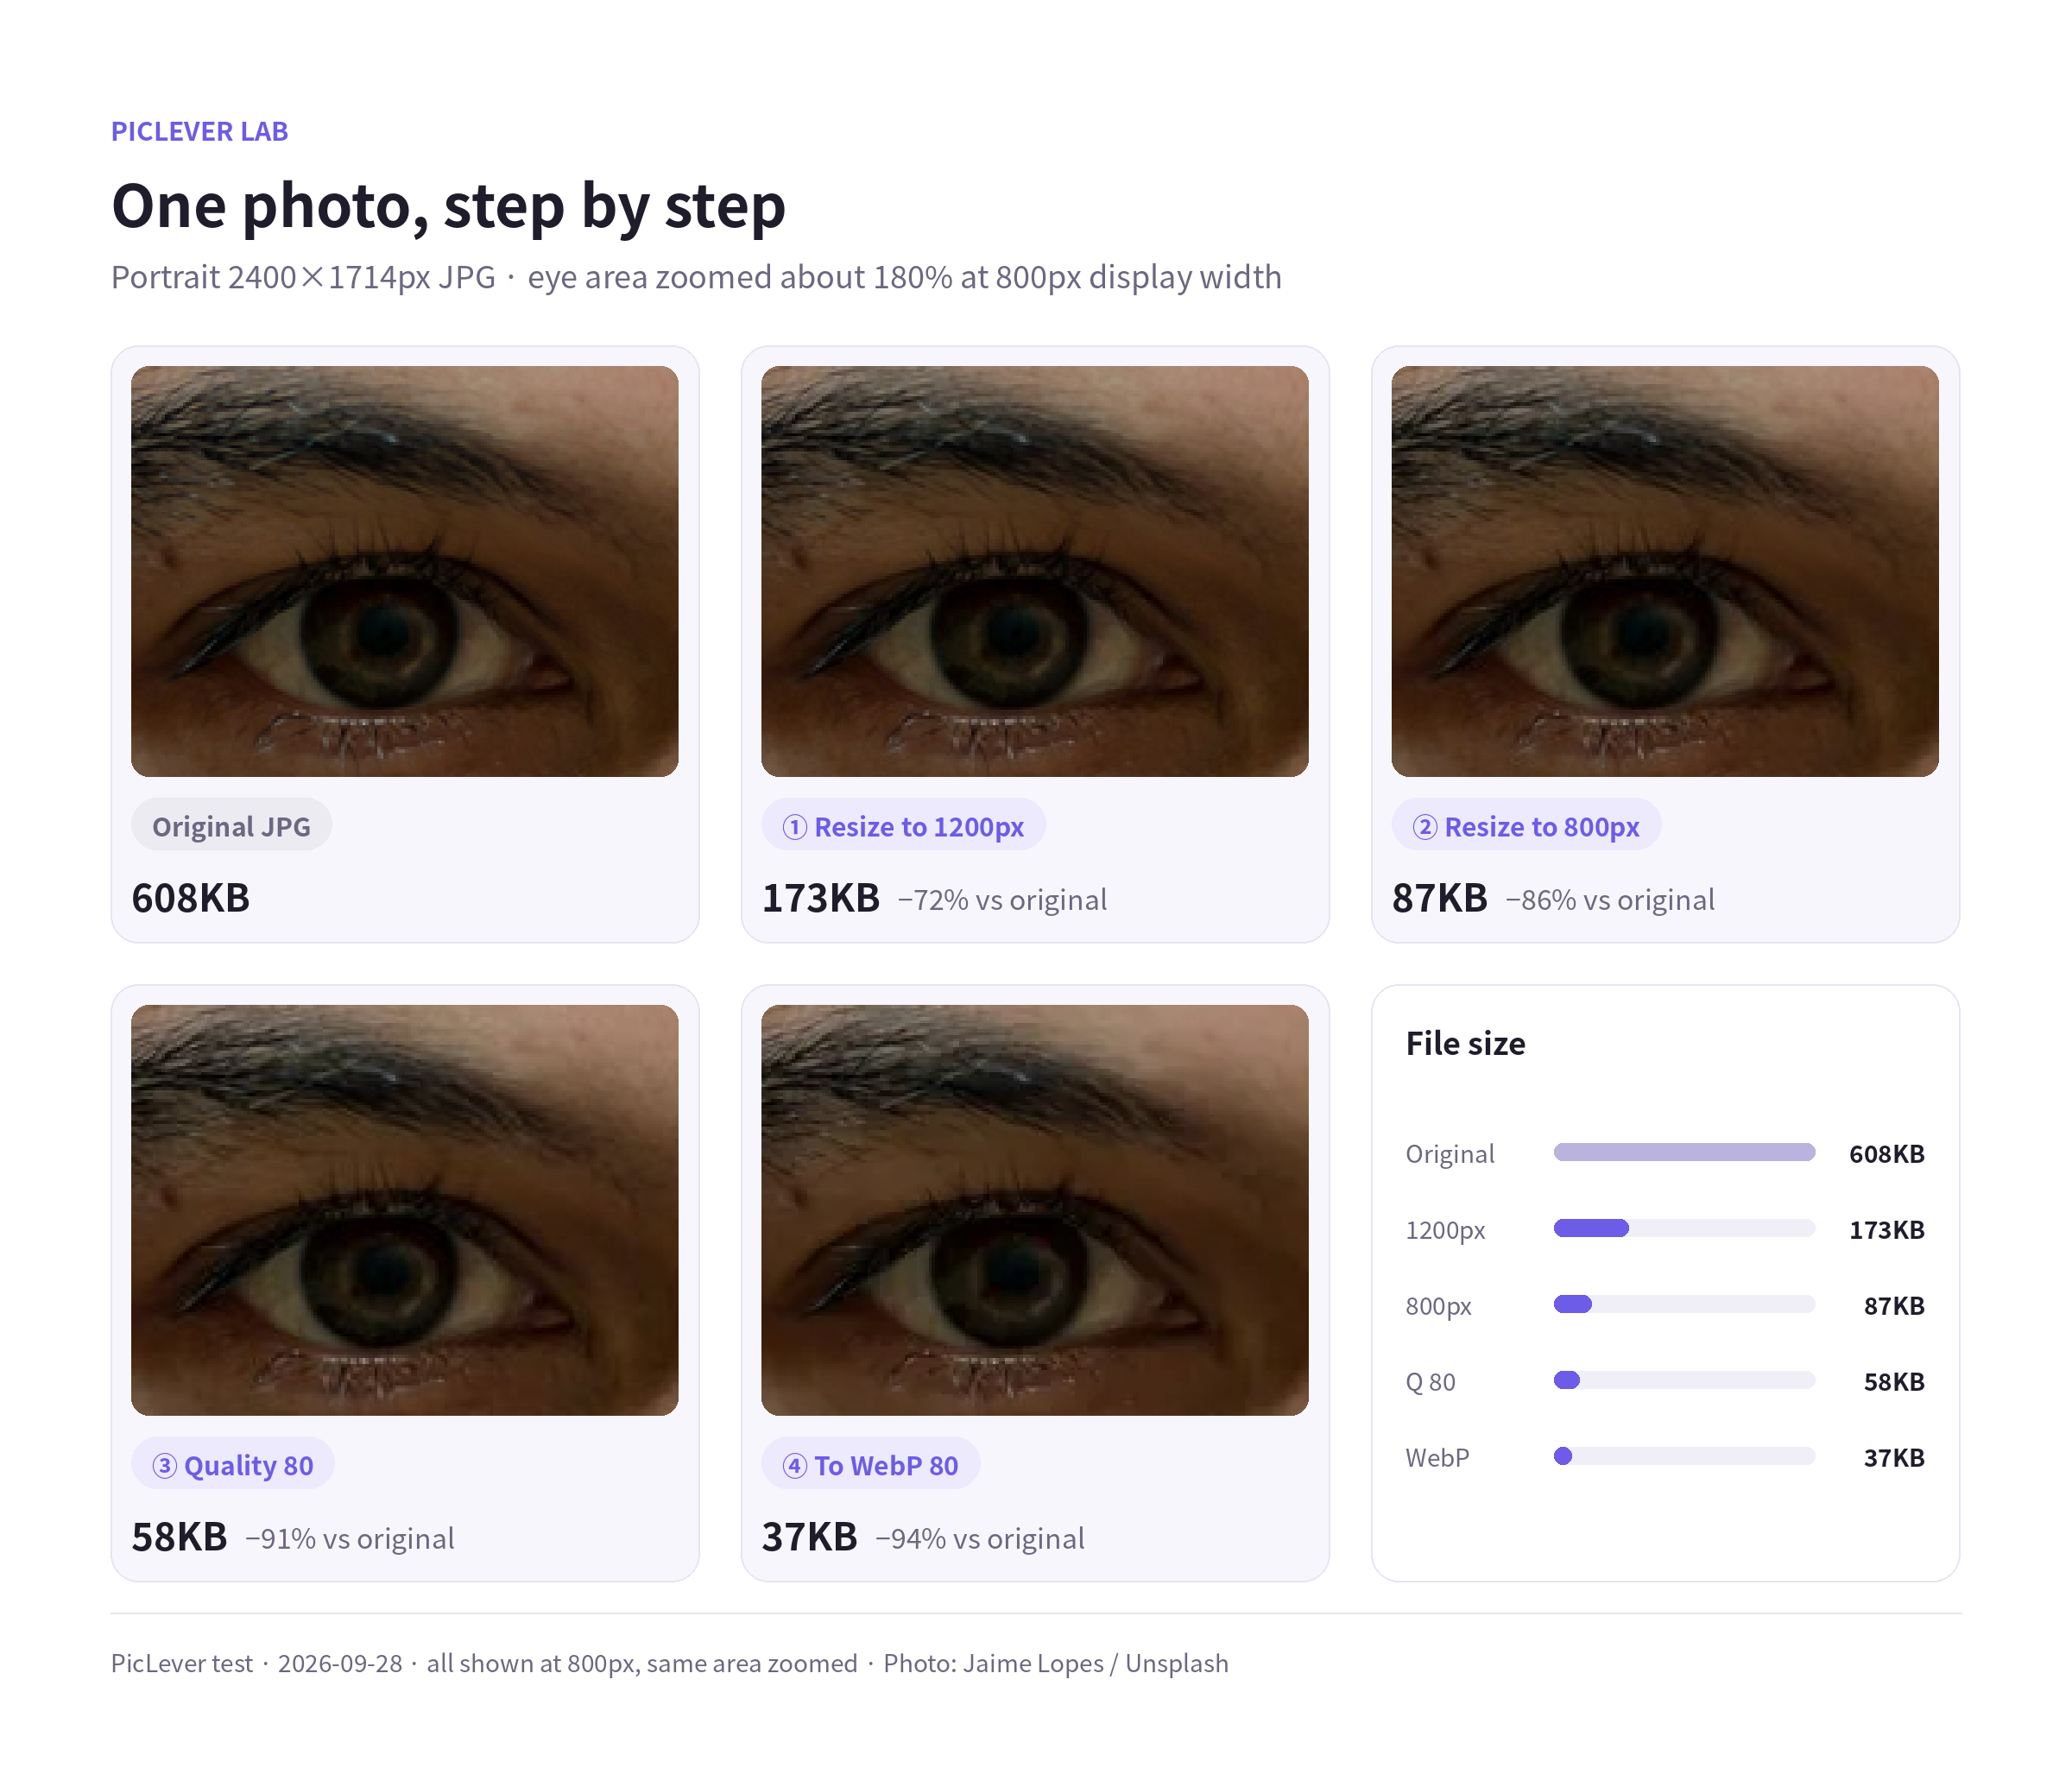
| Step | Width | File size | vs original | Similarity (SSIM) |
|---|---|---|---|---|
| Original JPG | 2400px | 608KB | — | 1.000 |
| ① Resize to 1200px | 1200px | 173KB | −72% | 0.986 |
| ② Resize to 800px | 800px | 87KB | −86% | 0.971 |
| ③ Quality 80 | 800px | 58KB | −91% | 0.956 |
| ④ WebP 80 | 800px | 37KB | −94% | 0.947 |
-
Dimensions: halving the width from 2400px to 1200px brought the file down to about a quarter, and 800px took it to a seventh of the original. Since the photo is shown at 800px anyway, the difference was hard to spot even zoomed in. This was the biggest single win.
-
Quality: dropping from 90 to 80 removed another third. For how low you can safely go, see the JPG quality 90 vs 80 vs 60 vs 40 test.
-
WebP: at the same quality 80, WebP was about 35% smaller than JPG. Zoomed in, skin texture gets a little smoother, but it's hard to notice at article width.
Same file size: shrink dimensions or quality?
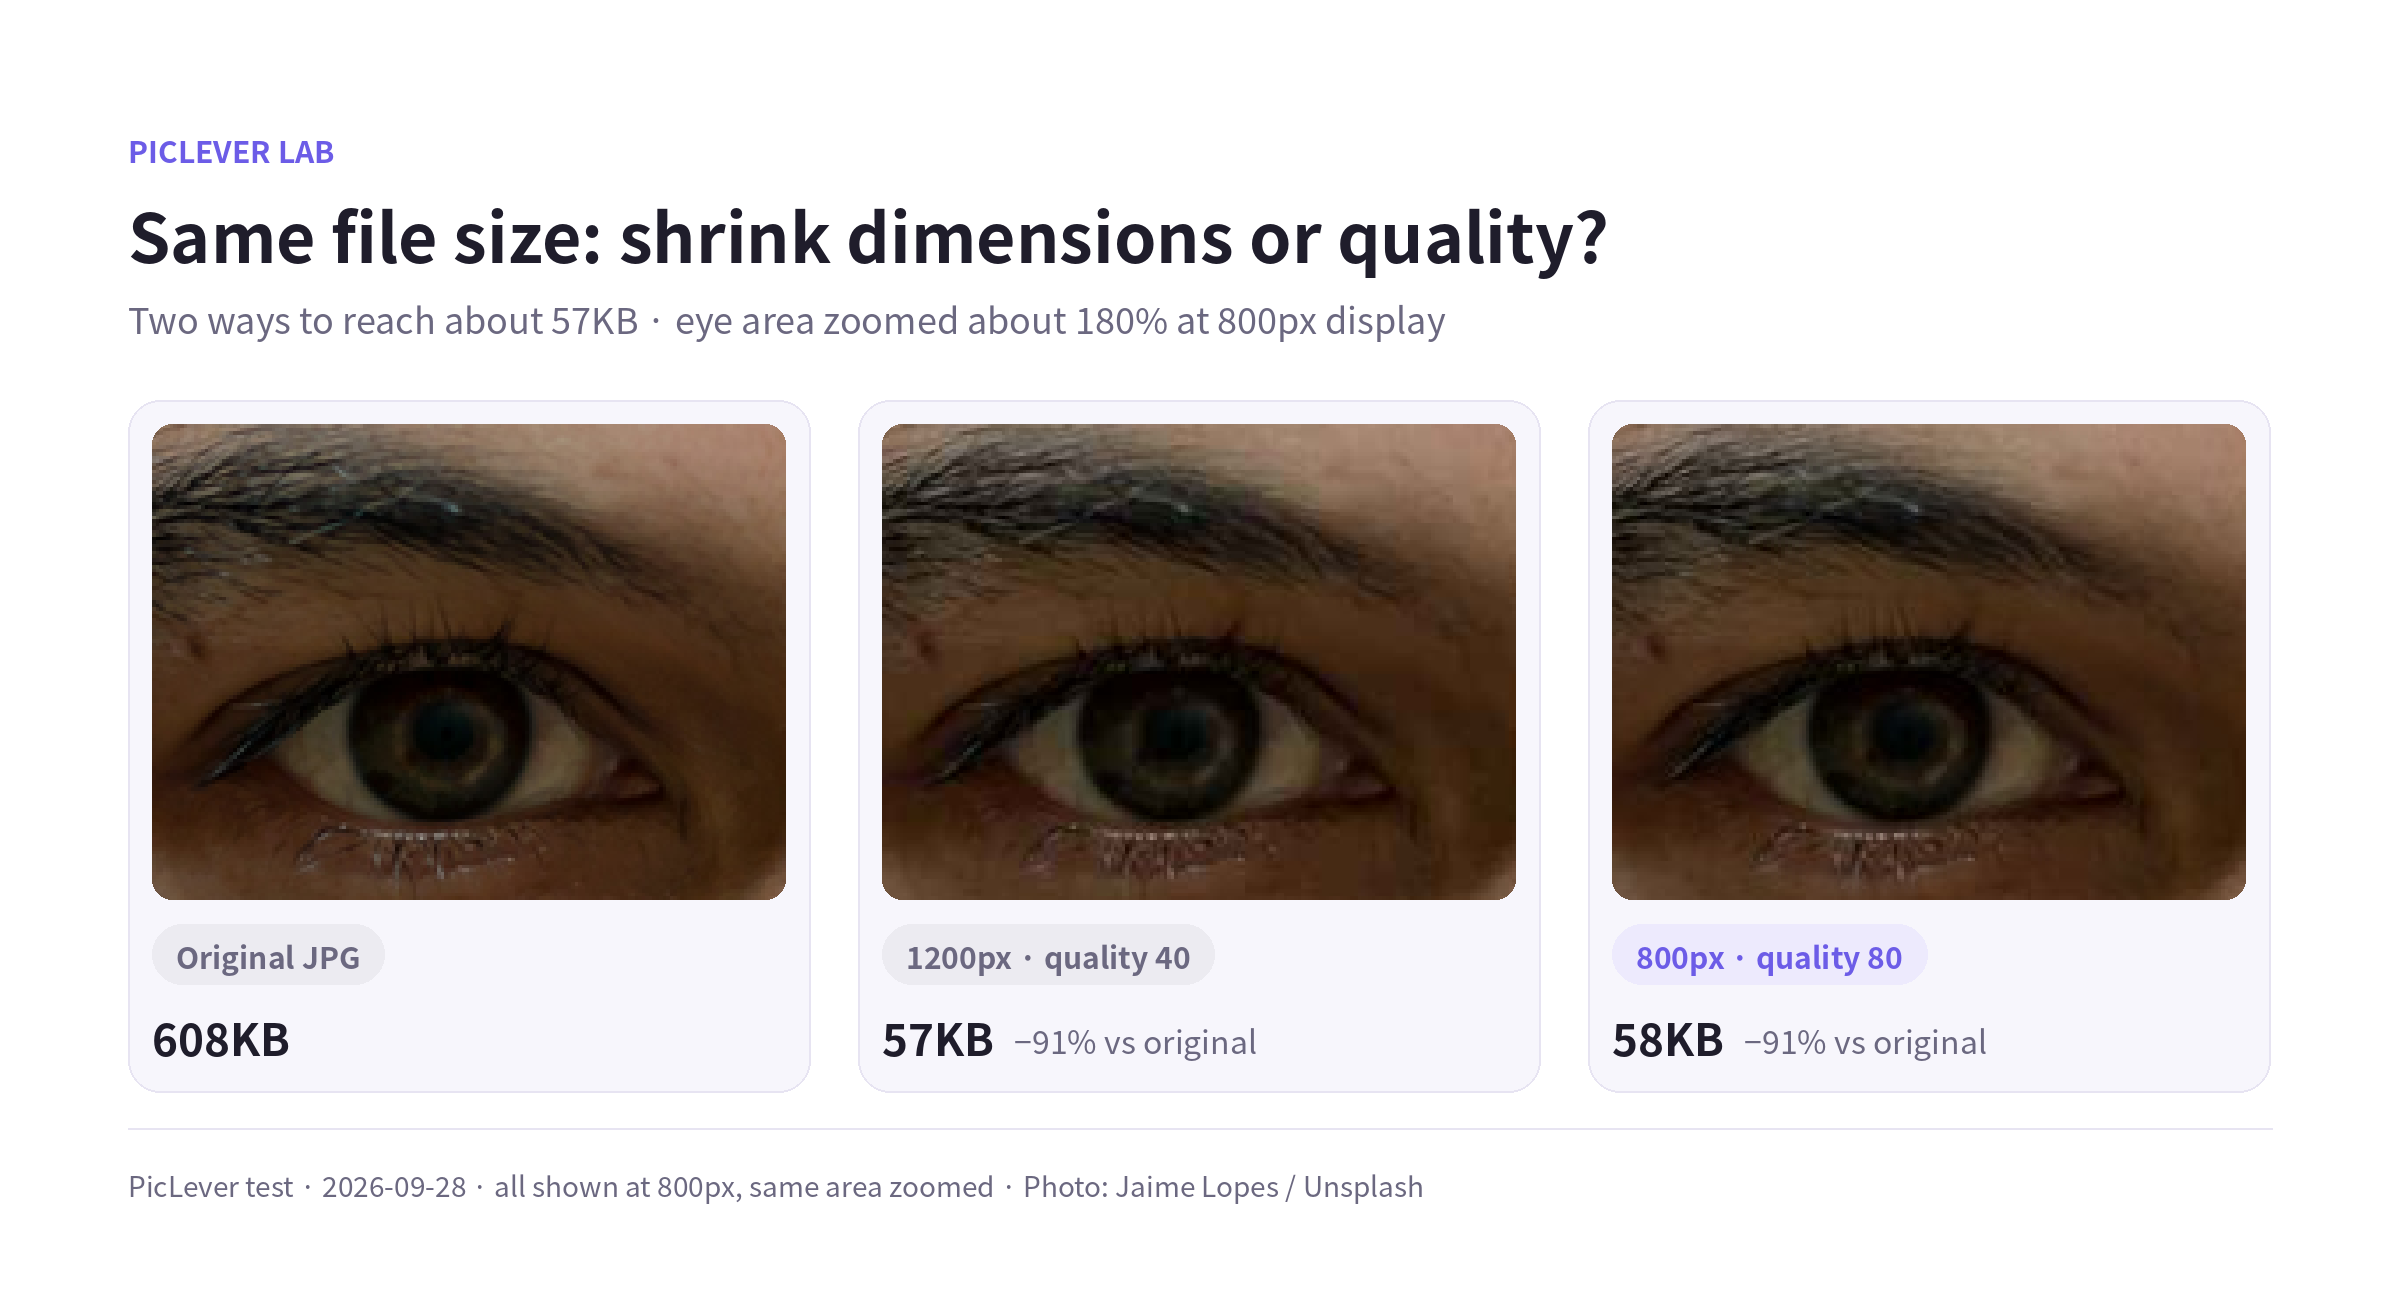
There are two ways to get this photo to about 57KB: keep it at 1200px and drop JPG quality to 40, or resize to 800px and keep quality 80.
-
1200px · quality 40 (57KB): the eyebrow hairs smear together and square blocks appear on the skin. SSIM 0.923.
-
800px · quality 80 (58KB): looks nearly identical to the original. SSIM 0.956.
If a photo is bigger than it will be displayed, resize it before lowering quality. There's no point sacrificing quality to keep pixels the screen will throw away anyway.
How to do it with PicLever
-
In the Image Resizer, enter the width and keep aspect ratio on. Saving as PNG means no quality loss at this step.
-
Upload the resized image to the Image Compressor, choose JPG or WebP as the output format and set quality to 80.
-
Check the result size. If it's still over your limit, lower quality in steps of 10. If you'd have to go below 60, resize once more instead.
If you only need to change the format, use the Image Converter.
How small should you go?
-
Blog and web articles: about the width of the content area (700–1000px) is enough. For extra-sharp results on high-density (Retina) screens, save at 1.5–2× the display width—like the 1200px (173KB) version in this test.
-
Social media and messaging apps: these services usually resize and recompress uploads, so uploading a huge original gains little.
-
Print and archiving: don't resize. Pixels you remove can't be brought back, so always keep your original.
FAQ
Q. Doesn't resizing make the image look worse?
If you only remove pixels beyond the display size, it looks almost the same on screen. It will look blurry, though, if you later print or enlarge the smaller version.
Q. Does the same order work for phone photos?
Yes. Phone photos are often around 4000px wide, so resizing alone usually solves the file size problem. Adjust quality after that.
Q. Can I change dimensions, quality and format all at once?
The Image Compressor changes format and quality together. Resize first in the Image Resizer. If you save as WebP, check that wherever you're uploading (a store, a submission form) accepts it.